


Maps make more sense in the field if you look at them when they are oriented – that is, lined up to the land around you. By Noel Bigwood
Orienting a map with visual clues
Without using a compass, the map can be oriented using visual clues, such as:
- Distinctive landforms; peaks, saddles, valleys, stream junctions
- Cultural features; tracks, roads, buildings, trigs, transmission towers
- The sun, which is due north at 12 noon outside of daylight saving (May to September) and at 1pm during daylight saving time.
Pick one obvious clue that you can identify on the map without any shadow of doubt. Turn the map until that feature is aligned on the map to how it lies on the ground. Pick another feature and check alignment, a small adjustment may be required. Confirm with several features.
Orienting a map with a compass
If you have a compass, you can use it to orient the map. The compass can be used to confirm your orientation with or without visual clues.
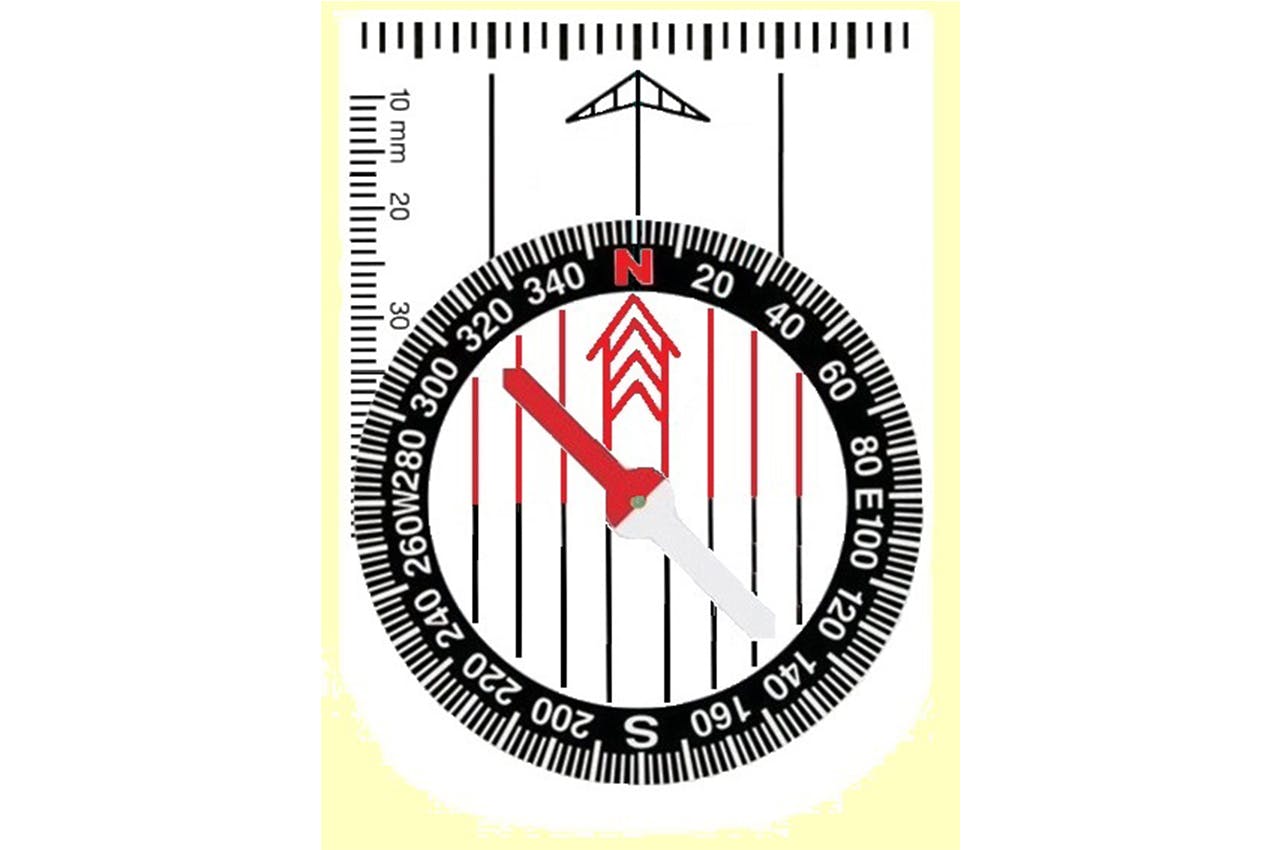
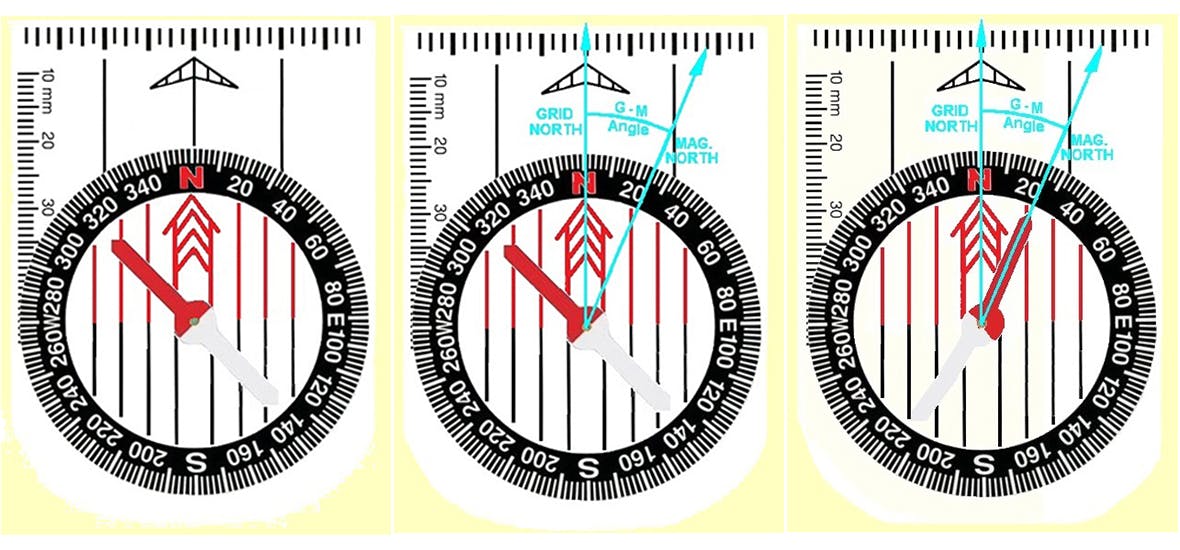
1. Set your compass to north (360deg).
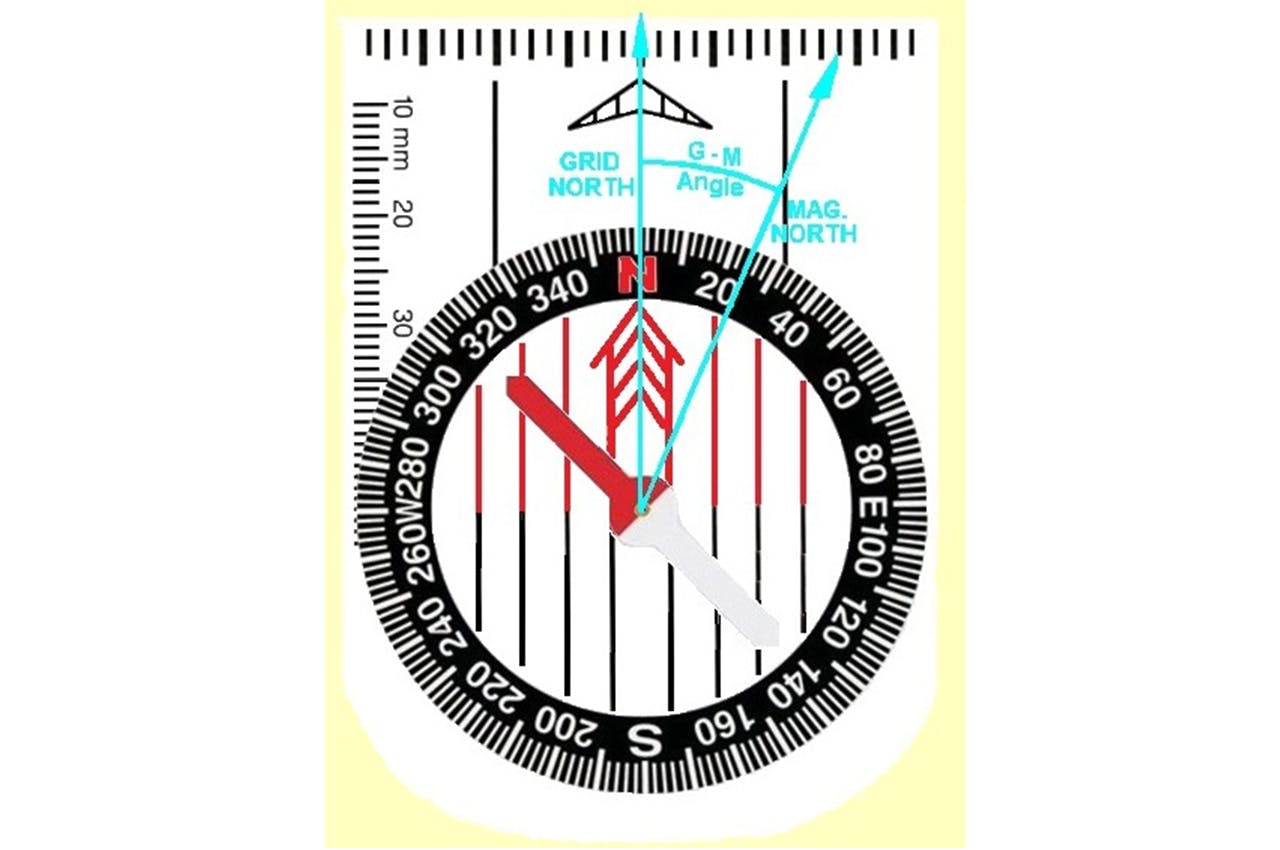
2. Place it on the magnetic variation diagram found in the map margin, with the direction of travel arrow in line with the diagram’s grid north arrow and the centre of the compass dial on the junction of the grid north and magnetic north lines.
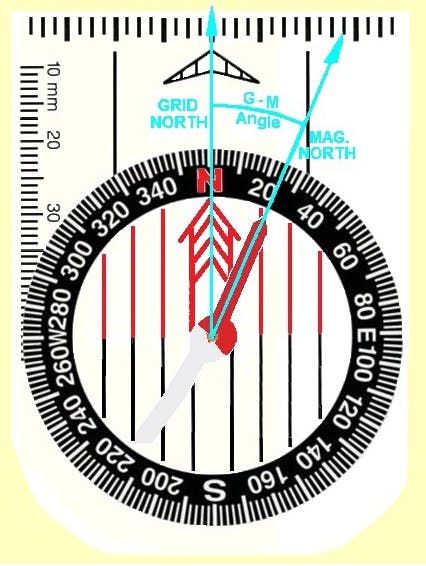
3. Rotate the map until the compass’s red magnetic needle lines up with the map’s magnetic north line. The map is orientated. Look across it and compare the land beyond.
– Noel Bigwood is an instructor with Outdoor Training New Zealand
